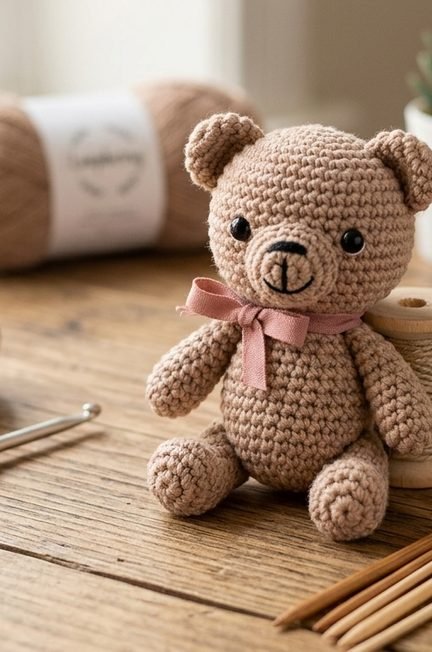
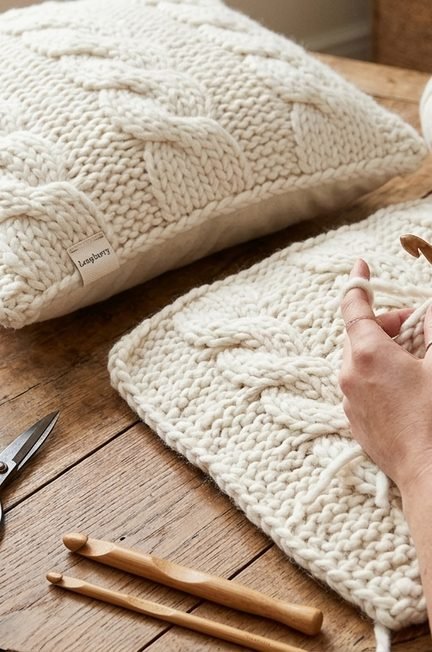

Imagine relaxing on your sofa surrounded by soft cushions, warm blankets and beautiful handmade decorations. A cozy home is often created through little details, and a chunky crochet cushion cover is a wonderful way to add warmth and personality to your space.
Crochet cushion covers are becoming popular among handmade home décor lovers because they combine beautiful textures with practical everyday use. Whether you prefer a modern neutral interior, a colorful bohemian style or a simple minimalist look, you can create a cushion cover that matches your home perfectly.
The best part is that you don’t need to be an expert crocheter to make one. With the right yarn, a comfortable crochet hook and a simple stitch pattern, you can create a beautiful handmade decoration.
In this guide, you’ll discover how to choose your materials, select a design, crochet your cushion panels and assemble your finished cover.
Why You’ll Love Making a Chunky Crochet Cushion Cover
There are many reasons to add a crochet cushion cover to your next project list.
- Cozy texture: Chunky yarn creates a thick and attractive appearance.
- Customizable: Choose colors that complement your interior.
- Beginner-friendly options: Simple rectangular designs are suitable for beginners.
- Beautiful handmade décor: Add personality to sofas, beds and chairs.
- Great gift idea: Handmade cushions make thoughtful housewarming presents.
- Reusable: A removable cover can be used with different cushion inserts.
You can make one cushion as a statement piece or create a matching set for your living room.
Materials You’ll Need
Before starting your project, prepare the following supplies:
| Material | Purpose |
|---|---|
| Chunky or bulky yarn | Main cushion fabric |
| Crochet hook | Suitable for your yarn |
| Cushion insert | Filling for your cover |
| Scissors | Cutting yarn |
| Yarn needle | Joining panels and weaving ends |
| Measuring tape | Checking dimensions |
| Stitch markers | Marking important sections |
| Buttons or zipper (optional) | Closing the cover |
What Is the Best Yarn for a Crochet Cushion Cover?
Choosing the right yarn is important because it affects the appearance, softness and durability of your cushion.
Cotton yarn
Cotton is a popular choice for home décor projects. It offers good stitch definition and is available in many colors.
Acrylic yarn
Acrylic yarn is widely available and comes in a variety of shades. It can be a practical option for decorative cushions.
Wool blends
Wool-blend yarns can create a warm and cozy texture, making them suitable for cushions used during colder seasons.
Chunky yarn
Bulky yarn creates a thick, textured fabric that can make a cushion look especially cozy.
Always check the yarn care label before choosing a material, especially if the cushion will be used frequently.
Choose Your Favorite Crochet Cushion Design
Before beginning, decide what style you want to create.
Here are some popular ideas.
1. Simple Textured Cushion
A simple textured cushion uses one main stitch pattern throughout the cover.
It is a lovely option for beginners who want a clean and modern result.
2. Granny Square Cushion
Combine several granny squares to create a colorful decorative cushion.
You can use matching colors for a coordinated appearance or mix different shades for a playful design.
3. Bobble Stitch Cushion
Bobble stitches create raised decorative details that give the cushion a beautiful three-dimensional texture.
4. Ribbed Crochet Cushion
Ribbed crochet creates a series of raised lines across the fabric.
This design looks especially attractive in neutral colors such as cream, beige and brown.
5. Striped Crochet Cushion
Use two or more colors to create horizontal or vertical stripes.
This is a great way to use leftover yarn from other crochet projects.
Step 1: Measure Your Cushion Insert
Start by measuring the cushion insert you plan to use.
Record its width and height so you can plan the dimensions of your crochet cover.
Remember that crochet fabric can stretch. For this reason, make a small sample using your chosen yarn and stitch pattern before beginning the full project.
Your sample will help you understand how many stitches and rows are needed to achieve your desired dimensions.
Step 2: Choose Your Stitch Pattern
The stitch pattern determines the texture and overall appearance of your cushion.
Here are a few options:
- Single crochet for a firm and simple fabric.
- Half double crochet for a soft texture.
- Double crochet for a more open appearance.
- Front-post and back-post stitches for ribbing.
- Bobble stitches for a decorative texture.
If you’re a beginner, start with a simple stitch pattern and focus on keeping your tension consistent.
Step 3: Crochet the Front Panel
Once you have selected your stitch pattern, begin creating the front panel.
Start with a foundation chain that matches your planned width.
Work your chosen stitches in rows until the panel reaches the desired height.
Measure your work regularly to make sure it remains consistent.
For a beautiful finish, keep your edges as straight as possible.
Step 4: Crochet the Back Panel
Now create the back section of your cushion cover.
You have two main options.
Option A: Two complete panels
Crochet a second panel with approximately the same dimensions as the front.
You can use the same stitch pattern or choose a simpler design for the back.
Option B: Envelope-style closure
Create two overlapping back panels that allow you to insert and remove the cushion without needing a zipper.
This is a practical option if you want an easily removable cover.
Step 5: Join the Cushion Panels
Place the front and back panels together with their edges aligned.
You can join them using:
- Slip stitches.
- Single crochet stitches.
- A yarn needle and suitable sewing method.
Work carefully around the edges, leaving the intended opening accessible if you’re making a removable cover.
Try to keep your seams even for a neat result.
Step 6: Add a Closure
Depending on your chosen design, you can finish the opening using:
- Wooden buttons.
- Crochet button loops.
- A zipper.
- An envelope-style overlap.
Buttons can add a beautiful decorative touch, while an envelope closure offers a simple way to remove the cover.
Step 7: Add Decorative Details
Now you can personalize your cushion.
Here are some beautiful finishing ideas:
- Crochet flowers.
- Small tassels.
- Pom-poms.
- Contrasting borders.
- Decorative buttons.
- Granny square motifs.
- Different textured stitches.
Try not to add too many decorations if you want a minimalist appearance.
How to Choose Colors for Your Cushion
Color selection can completely change the look of your finished project.
Here are some combinations to inspire you.
Neutral and Minimalist
- Cream and beige.
- White and taupe.
- Brown and ivory.
- Gray and charcoal.
Soft and Feminine
- Dusty pink and cream.
- Lavender and white.
- Peach and beige.
- Pale yellow and mint.
Warm and Cozy
- Terracotta and cream.
- Rust and brown.
- Mustard and beige.
- Olive green and ivory.
Colorful and Playful
- Pink, yellow and blue.
- Orange, green and purple.
- Turquoise and coral.
- Bright red and cream.
For a coordinated interior, choose colors that already appear in your room.
How to Style Your Crochet Cushion Cover
A handmade crochet cushion can look beautiful in many spaces.
Living room: Place it on your sofa alongside cushions with different textures.
Bedroom: Use it as a decorative cushion on your bed.
Reading corner: Add it to a comfortable chair with a soft blanket.
Bohemian interior: Combine colorful crochet cushions with natural materials and wooden furniture.
Minimalist interior: Choose simple neutral colors and a clean stitch pattern.
Tips for a Professional-Looking Crochet Cushion
Before finishing your project, keep these tips in mind.
- Make a gauge sample. This helps you plan the correct dimensions.
- Choose suitable yarn. Select a material that is comfortable and practical.
- Keep your tension consistent. This helps prevent uneven panels.
- Measure as you work. Don’t rely only on stitch counts.
- Finish your edges neatly. Clean seams make the project look more professional.
- Secure your yarn ends. Avoid loose ends that could come undone.
- Consider a removable cover. It makes cleaning much easier.
Frequently Asked Questions
Is a chunky crochet cushion cover suitable for beginners?
Yes. A simple rectangular cushion cover using basic crochet stitches is a good beginner project.
What yarn is best for a chunky crochet cushion?
Bulky cotton, acrylic and suitable wool blends are all possible choices. The best option depends on the desired texture and care requirements.
How much yarn do I need?
The amount depends on your cushion dimensions, yarn thickness, stitch pattern and personal tension. Check your yarn label and make a sample before purchasing all your supplies.
Can I crochet a cushion cover without a cushion insert?
Yes. You can make the cover first and purchase an insert that matches its finished dimensions.
Should I wash my crochet cushion cover?
Follow the care instructions for your chosen yarn. A removable cover is generally easier to clean than a cushion that cannot be separated from its filling.
Can beginners make a granny square cushion?
Absolutely. Granny squares are a good way to practice basic crochet techniques and create colorful home decorations.
Can I sell crochet cushion covers?
Yes. You can sell finished handmade cushion covers. If you use another designer’s pattern, check the licensing terms before selling products made from it.
Final Thoughts
A chunky crochet cushion cover is a beautiful way to bring warmth and handmade creativity into your home.
Whether you choose a simple textured design, a colorful granny square pattern or a cozy ribbed cushion, you can create something that reflects your personal style.
Start with your favorite yarn, experiment with different stitches and enjoy making a unique piece of crochet home décor.
Discover more handmade projects, creative ideas and beginner-friendly tutorials here at Loopberry – Little Loops, Endless Creativity.
Want the complete printable cushion pattern?
Add your Chunky Crochet Cushion Cover PDF here, including:
- Exact stitch counts.
- Yarn quantities and hook size.
- Cushion dimensions.
- Row-by-row instructions.
- Joining and closure instructions.
- Original step-by-step photographs.
This article is an introductory project guide, not a tested stitch-by-stitch pattern. Complete and test the instructions before presenting the PDF as a finished crochet pattern.